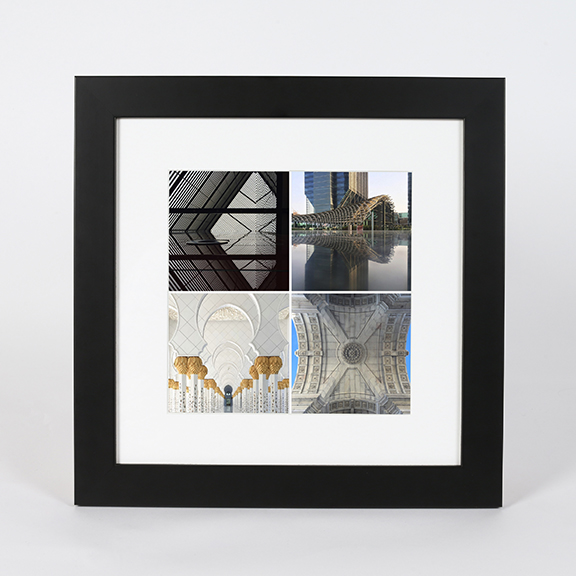
There is something visually pleasing and fascinating about symmetry and whilst it can easily go unnoticed day to day, when captured or viewed in a photograph, the result can often excite and captivate both the photographer and the viewer instantly.
Below are some of my essential tips that can easily be implemented which are sure to assist anyone in starting or improving symmetry captures.
1) Use The Grid
This feature within the native camera on the iPhone is not known by all but is possibly the most important when it comes to shooting in general and especially when aiming to achieve perfect symmetry as it assists with both your vertical/horizontal alignment and composition. Since discovering it myself on my iPhone 5 a few years ago, I have never turned it off.
To turn on the grid, go to Settings > Phone & Camera > scroll down to the bottom and turn Grid on!
2) Notice and Play with Reflections
Early on, the majority of my symmetry captures were of architectural structures but it didn't take me long to get a little more creative. Whilst out and about, just keep in mind that symmetry does not always have to be of obvious subjects in obvious compositions, such as being directly in the centre of a building looking up or standing in the middle of a bridge. Take the time to appreciate all the details in your surroundings. Lake reflections, holding your phone against a window, or taking advantage of the puddles thanks to a rainy day are just a few of the simple opportunities you have to create unique results and perspectives with symmetry.
Symmetry was achieved here by wiping down a bench and placing my iPhone horizontally on its side, with the camera side closest to the bench.
3) Keep Your Position and Crop in Mind when Shooting
A long time ago, I had been out shooting all day and became rather frustrated when many of my favorites of the day were unusable as I realized during my cropping process that I didn't stand far enough or take the millimeters I'd lose whilst straightening into consideration. Since that day, I always ensured I took multiple shots, just to be sure I was left with at least one shot, what I like to call the money shot!
Nowadays, with the choice of posting in either square, portrait or landscape, it isn't too much of an issue but I still do take multiple shots and find that I sometimes flick between portrait/landscape and square mode just to get an idea of my preferred composition and likely crop prior to tapping the shutter.
It is also important to note that the iPhone camera is not in the centre of the phone, so if you've ever wondered why some subjects such as tunnels or building corners are not perfectly symmetrical, it could just be that you didn't position your camera in the right place and instead focused on your body/eye view. It just takes a few shuffles to the left or right to achieve perfect symmetry, so get shuffling!
4) Use your Subject or Details Around You to Assist You
Whilst taking reflection shots at Sheikh Zayed Mosque, so many people were looking at me strangely as I was counting tiles and changing positions; but I assure you, the few stares are worth it! Whether you're looking up, down or straight ahead, be it tiles on the floor, windows on a building or the number of lanes on a highway, use your subject and the details in your frame and around you to assist you in positioning yourself in the best possible spot.
5) Hold Your Breath and Shoot
Just under 4 years ago, I started the hashtag #holdyourbreathandshoot, it is a simple and very handy technique that anyone can implement into their captures with an iPhone as it ensures you are completely still and minimizes any possible shake or motion blur, ensuring clean crisp lines and details which result in visually pleasing results.
This technique is especially important if using a Photo App such as Inkifi.
6) Don't Be Afraid of Using Perspective Correction Apps
Whilst it is highly satisfying to capture a perfectly symmetrical image that requires no adjustments to the perspective in the post production, at times, due to certain circumstances, it is necessary.
My go-to app for perspective correction is SKRWT. It is extremely user friendly and allows you to correct horizontal, vertical and lens distortions with the simple slide of a bar.

Symmetry images beautifully printed as an Instagram friendly Framed Print.

This blog post was written by Samah El Ali, a Sydney based full time travel consultant with a passion for photography that developed in her early teens. Her Instagram account @samah.elali is a mixed bag, most renowned for her keen eye for symmetry and composing lines in a visually appealing way, but she can often be found appreciating and capturing the beautiful little details that she comes across in her travels and day to day life.
